How to Fix a Laptop That Won’t Turn On
How to fix a laptop that won't turn on: 9 tested steps for power, battery, display, and RAM faults, plus how to keep your data safe at repair shops.
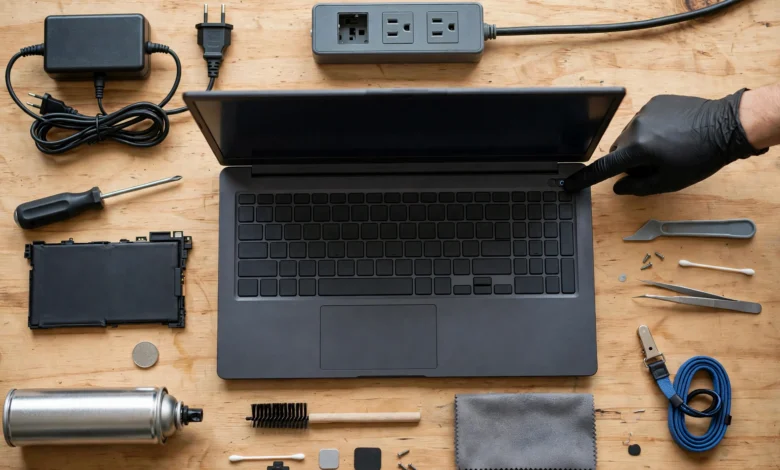
How to Fix a Laptop That Won’t Turn On: 9 Proven Steps That Actually Work
Introduction
How to fix a laptop that won’t turn on is one of those searches people usually make in a panic, often from a phone, often with a deadline or a presentation an hour away. The good news is that most of the time the problem is not as bad as it looks. A loose charger, a drained battery, a frozen power state, or a screen that simply is not lighting up can all make a perfectly healthy laptop look dead. Many of these problems take less than ten minutes to fix at home, with no tools.
This guide walks you through nine steps in the order a good technician would try them, from the simplest checks to the more involved ones. You will learn how to tell a power problem apart from a display problem, how to do a proper hard reset, and what beep codes and blinking lights are trying to tell you.
It also covers the part most guides skip: what happens when you do need outside help. In 2016, technicians at an Apple contractor’s repair facility posted a customer’s private photos from her phone to her own Facebook account. A 2022 university study found technicians at half the repair shops tested looked through customers’ personal files. And tests on 400 counterfeit chargers found nearly all of them unsafe. Fixing your laptop is the goal, but protecting your data and your safety while you do it matters just as much.
Before You Fix a Laptop That Won’t Turn On, Figure Out What “Won’t Turn On” Means
The phrase laptop won’t turn on covers several very different problems. Spending one minute observing what actually happens when you press the power button will save you a lot of guesswork.
Scenario A: Completely Dead
No lights, no fan noise, no keyboard backlight, nothing. This almost always points to power: the charger, the outlet, the battery, the charging port, or the laptop being stuck in a protective shutdown state. It is the most common case, and often the easiest to fix.
Scenario B: Lights or Fans, but a Black Screen
The power light comes on, you can hear the fan, maybe the Caps Lock key lights up, but the screen stays black. The laptop is actually running. The problem is likely the display, the graphics, the memory, or the laptop waking from a sleep state incorrectly. This is the classic laptop black screen problem.
Scenario C: Turns On, Then Shuts Off
The laptop starts for a few seconds, then dies. Common causes are overheating protection, a failing battery that cannot hold voltage, a short circuit, or a faulty RAM module.
Scenario D: Turns On but Won’t Boot
You see the manufacturer logo, an error message, or a repair loop, but Windows or macOS never loads. Technically the laptop does turn on; this is a software or storage problem, and the fix is different.
Write Down the Clues
Before trying any fix, note these details:

- Is the charging light on, off, or blinking?
- Do the fans spin or the keyboard light up?
- Do you hear any beeps, and how many?
- Did anything happen right before: a drop, a spill, a Windows update, a storm, a new charger?
- Does the laptop feel unusually hot?
These clues tell you where to start, and they are exactly what a technician will ask you if it comes to that.
How to Fix a Laptop That Won’t Turn On: 9 Steps in Order
Work through these steps in order. Each one rules out a cause, and most people find the problem in the first four.
Step 1: Check the Charger, Cable, and Outlet
It sounds too simple, but power supply problems are the most common reason a laptop won’t turn on when plugged in.
- Plug something else into the same wall outlet to confirm it works, or try a different outlet. Skip power strips and extension boards for now.
- Check both ends of the charger. Many adapters have a two-part cable, and the section between the brick and the wall can come loose.
- Look at the brick’s indicator light if it has one. No light usually means a dead adapter.
- Inspect the cable for kinks, fraying, or melted spots near the connector.
- If you have a USB-C laptop, try a different USB-C port on the laptop, and make sure the charger is rated for enough watts. A phone charger will not power most laptops.
If you can borrow a compatible charger from a friend or office, that is the fastest way to rule this out.
Step 2: Let It Charge for 30 Minutes
A fully drained lithium-ion battery may need time before it can supply enough power to boot. Leave the laptop plugged in for at least 30 minutes without pressing anything, then try again. Watch the charging light: if it comes on, the laptop is getting power and the battery was simply flat.
Step 3: Do a Hard Reset (Power Drain)
A hard reset clears leftover electrical charge and can unstick a laptop that is frozen in a power state. It does not delete any of your files.
- Unplug the charger and disconnect every accessory: USB drives, mice, docks, SD cards.
- If the battery is removable, take it out.
- Press and hold the power button for 30 seconds. Some manufacturers recommend up to 60 seconds.
- Reconnect the battery (if removed) and the charger only, then press the power button normally.
If your battery is built in, holding the power button for 15 to 30 seconds with the charger unplugged usually has a similar effect. Many Dell, HP, and Lenovo models also have a tiny emergency reset pinhole on the bottom; check your model’s manual.
Step 4: Rule Out a Display Problem
If the laptop shows signs of life but the screen is black:
- Press Windows key + Ctrl + Shift + B. This restarts the graphics driver in Windows. You should hear a beep and the screen may flicker back.
- Try the brightness-up key a few times. Some laptops boot with the brightness at zero.
- Shine a flashlight at an angle onto the screen. If you can faintly see an image, the backlight has failed but the laptop is working.
- Connect an external monitor or TV with HDMI. If you get a picture there, the problem is the laptop’s screen or its cable, not the whole computer.
Step 5: Let It Cool Down
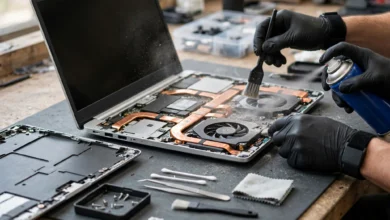
Laptops have thermal protection that shuts them down and blocks restarts if they get too hot. If the bottom feels hot, or the laptop shut down during heavy use, leave it unplugged in a cool room for 30 to 60 minutes. Make sure the vents are not blocked by dust, a bed, or a blanket. Recurring overheating usually means the fan and heatsink need cleaning or the thermal paste needs replacing.
Step 6: Listen for Beep Codes and Watch the Lights
Many laptops report hardware faults through beep codes or blinking patterns on the power or Caps Lock light. For example, Dell uses patterns of amber and white blinks, and HP uses Caps Lock blink counts. Count the beeps or blinks, then look them up on your manufacturer’s support site. These codes can point directly to the RAM, the CPU, the motherboard, or the BIOS.
Step 7: Reseat or Test the RAM
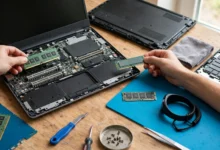
A loose or failed memory module is a common cause of a laptop that powers on with a black screen. If your laptop has an accessible RAM slot and you are comfortable opening the bottom panel, disconnect the battery, remove the module, and push it firmly back into place. If there are two modules, try booting with one at a time. If you are not comfortable doing this, skip to the professional help section.
Step 8: Reset the BIOS or CMOS
Corrupted BIOS settings or a dead CMOS battery can stop some laptops from starting. Some models let you reset the BIOS with a key combination or a reset jumper. Others require briefly disconnecting the small coin-cell CMOS battery inside. Because this varies so much between models, follow your manufacturer’s service manual exactly. If the laptop died during a BIOS update, many HP and Dell models include a recovery mode that can restore it from a USB drive.
Step 9: Fix Boot and Software Problems
If the laptop turns on but will not load Windows:
- Force the Windows Recovery Environment by turning the laptop on and holding the power button to shut it off as soon as the logo appears. Do this three times, and the fourth start should open Automatic Repair.
- From there, try Startup Repair, then System Restore, then “Uninstall Updates” if the problem started after an update.
- Use Safe Mode (Troubleshoot, Advanced options, Startup Settings) to remove a recently installed driver or app.
- If none of this works, the storage drive may be failing. Do not keep restarting repeatedly, because that can make data recovery harder.
Brand-Specific Tips When Your Laptop Is Not Turning On
The nine steps above work for almost any laptop, but each brand has a few quirks worth knowing.
MacBooks
- Apple silicon (M1 and later): Press and hold the power button (Touch ID) for about 10 seconds, release, then press it again. There is no separate SMC reset on these models; a full shutdown and restart does the same job.
- Intel MacBooks with the T2 chip (2018 to 2020): Shut down, then press and hold Control + Option + Shift (right side) for 7 seconds, add the power button, and hold all four for another 7 seconds. Release, wait a few seconds, and start normally. This resets the System Management Controller (SMC).
- Older MagSafe chargers have a status light. Amber means charging, green means full, and no light means the charger or connection is the problem.
Dell
Dell laptops use a mix of amber and white blinks on the power or battery light as diagnostic codes, and many models support a built-in diagnostic test (ePSA) by holding the Fn key while pressing power. Some newer models also include a BIOS recovery shortcut.
HP
HP laptops often blink the Caps Lock or Num Lock light a set number of times to indicate a fault. Many models support BIOS recovery by holding Windows + B while pressing the power button with the charger connected.
Lenovo
Many Lenovo laptops, especially IdeaPad and Yoga models, have a small Novo button or pinhole that opens a recovery menu. ThinkPads often have an emergency reset pinhole on the bottom that works as a hardware power drain.
Asus, Acer, and Others
For most other brands, the 30-second hard reset in Step 3 and an external monitor test in Step 4 are the most useful home checks. Look up your exact model on the manufacturer’s support site for any reset holes or key combinations.
The Realities: What Can Go Wrong After Your Laptop Leaves Your Hands
Most repair technicians are honest, skilled people. But real cases show that a dead laptop creates risks beyond the hardware itself: your private data, your safety, and your wallet. Here are three examples worth knowing before you hand anything over or buy a cheap replacement part.
Case 1: Repair Technicians Who Posted a Customer’s Private Photos
In 2016, a 21-year-old student in Oregon sent her iPhone to Apple for repair. It was routed to a repair facility in Sacramento, California, run by Apple contractor Pegatron. Two technicians there accessed her files and posted ten private photos and a sexual video to her own Facebook account, making it look as if she had shared them herself. Apple later paid a multimillion-dollar settlement, and the technicians were fired. AppleInsider’s report on the Pegatron repair privacy case covers how it came to light through a separate insurance dispute.
The device was a phone, not a laptop, but the lesson is identical. Even an official, brand-managed repair chain is only as trustworthy as the individual person holding your device.
Case 2: A Study That Caught Half of Repair Shops Snooping
In 2022, researchers at the University of Guelph in Canada gave laptops with a minor, easy-to-fix fault to repair shops, then checked hidden logs afterward. Technicians at six of the twelve locations tested accessed personal data, and two copied files onto their own devices. Laptops set up to look like they belonged to women were more likely to be snooped on, and the searches targeted more sensitive material like photos and financial files. Some technicians even tried to hide their tracks by clearing recent-file history. Read The Register’s coverage of the University of Guelph repair privacy study for the full details.
The study also found that almost every shop asked for the login password, even for a battery replacement that never needs it.
Case 3: Counterfeit Chargers That Fail Basic Safety Tests
When a laptop will not turn on, many people buy the cheapest replacement charger they can find. That can be dangerous. In 2016, the UK’s Chartered Trading Standards Institute had safety specialists UL test 400 counterfeit Apple chargers bought online from eight countries. Only three had enough insulation to protect against electric shock, a failure rate of about 99 percent. See 9to5Mac’s summary of the counterfeit charger safety tests.
A fake charger can damage your laptop’s charging circuit, start a fire, or give you an electric shock. Sometimes it is the very reason the laptop died in the first place.
Your Side of the Ethics
Honesty runs both ways. A few things to keep in mind as the customer:
- Tell the technician the truth about drops or spills. Hiding liquid damage wastes their time and can lead to the wrong repair.
- Do not claim accidental damage is a factory defect to get a free warranty repair. That is warranty fraud, and it raises costs for everyone.
- Do not buy cheap “used” parts or laptops with no history from street sellers or social media. Stolen laptops are commonly stripped for parts, and buying them keeps that market alive.
- If a repair shop makes an honest mistake, give them a chance to fix it before posting angry reviews.
When to Stop and Get Professional Help
Knowing when to stop is part of knowing how to fix a laptop that won’t turn on. Pushing further on your own can turn a cheap repair into an expensive one.
Signs It Is a Hardware Fault
Take the laptop to a professional if:
- You smell burning, see swelling in the case, or notice the trackpad lifting. A swollen battery is a fire risk; stop using the laptop and do not charge it.
- There was a liquid spill. Do not try to power it on repeatedly. Unplug it, remove the battery if possible, and get it to a technician quickly.
- The charging port feels loose or wobbly, or the charger only works at certain angles.
- Beep codes or blink codes point to the motherboard or CPU.
- You have tried every step above with a known-good charger and still get no sign of life.
Check Your Warranty First
Before paying anyone, check your warranty status on the manufacturer’s website using your serial number. Many laptops have one to three years of coverage, and some credit cards extend it. Opening the laptop yourself may complicate a warranty claim in some regions, so if it is still covered, let the manufacturer handle it.
How to Protect Your Data Before a Repair
If the laptop still turns on at all, even briefly, use that window:
- Back up your important files to an external drive or cloud service.
- Sign out of sensitive accounts in your browser, and turn off saved passwords if you can.
- Turn on full-disk encryption (BitLocker on Windows, FileVault on Mac) so the drive is unreadable without your password.
- Create a separate guest account for the technician if they need to test Windows, rather than handing over your own password.
If the laptop is completely dead:
- Ask whether the repair needs your password at all. Battery, charger, screen, and power-jack repairs usually do not.
- Ask for the storage drive to be removed and returned to you if the fault is clearly elsewhere.
- Choose shops that offer on-the-spot repairs while you wait for simple jobs.
- Get a written receipt that lists the fault, the parts replaced, the price, and the warranty on the repair.
Choosing a Trustworthy Repair Shop
- Prefer manufacturer-authorized service centers for laptops under warranty.
- For independent shops, look for a long track record, clear written pricing, and reviews that mention honesty, not just speed.
- Ask for the old parts back. A shop that refuses may not have replaced them.
- Be wary of anyone who quotes a “motherboard replacement” without running basic tests first; a dead charger or a loose RAM module is far more common.
- Buy replacement chargers only from the manufacturer or well-known accessory brands, never unbranded sellers with prices that look too good to be true.
Conclusion
Learning how to fix a laptop that won’t turn on starts with working out what kind of “dead” you are dealing with, then moving through the fixes in order: check the charger and outlet, give the battery time to charge, do a hard reset, test the display with a key shortcut or external monitor, let an overheated machine cool, read the beep and blink codes, reseat the RAM, reset the BIOS, and finally repair Windows through the recovery tools, with brand-specific tricks like the Mac SMC reset or HP’s BIOS recovery filling in the gaps. Most cases are solved in the first few steps, and when they are not, the right move is a trustworthy technician rather than more guesswork. Real cases, from repair technicians who leaked a customer’s private photos to a university study that caught half of tested shops snooping on files and counterfeit chargers that failed safety tests 99 percent of the time, show that how you get your laptop fixed matters as much as the fix itself, so back up and encrypt your data when you can, share passwords only when truly needed, buy genuine chargers, and be honest with the people repairing your device.