How to Clean Your Laptop’s Internal Fans and Cooling System
Clean laptop fans safely with this step-by-step guide to clearing dust, fixing overheating, and protecting your warranty, your data, and your hardware.
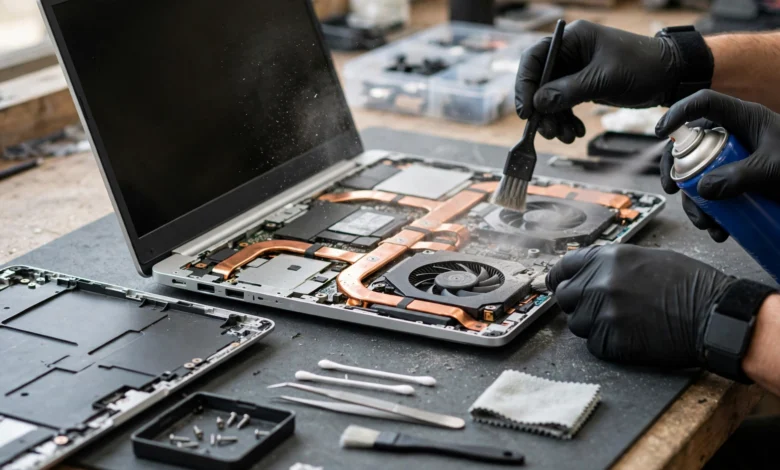
Clean Laptop Fans in 7 Easy Steps: Proven Fixes for Overheating
:Introduction
If you want to clean laptop fans properly, it helps to know why they get dirty in the first place. Every time your laptop runs, its fan pulls room air through small intake vents. Along with that air comes lint, pet hair, skin flakes, and fine household dust. Over months, that debris packs into the thin metal fins of the heatsink like a felt pad. Airflow drops, heat builds up, and the processor protects itself by slowing down. That slowdown is called thermal throttling, and it is the reason a two-year-old machine can feel much older than it is.
The good news is that learning how to clean a laptop fan usually takes about 30 minutes and a few cheap tools. Many people see temperatures fall by 10 to 20 degrees Celsius and hear the fan go quiet again.
There is also a side to this job that most guides skip. Opening a laptop raises fair questions about your warranty, about repair shops, and about who can see your files. Some companies and technicians have crossed legal lines on exactly these points, and those cases are worth knowing before you pick up a screwdriver or hand your machine to a stranger.
This guide walks through how the laptop cooling system works, the warning signs of a clogged fan, a seven-step cleaning method, real cases where repair went wrong, and the habits that keep heat under control for years.
Why You Need to Clean Laptop Fans: How the Cooling System Works
A laptop has no room for big fans or open airflow, so its cooling system is a tight, efficient loop. When any part of that loop gets blocked, the whole thing struggles. Understanding the parts makes the cleaning steps far easier to follow.
The Parts of a Laptop Cooling System
- Heat pipes: Flat copper tubes that sit on top of the processor (CPU) and graphics chip (GPU). They carry heat away from the chips toward the edge of the laptop.
- Heatsink fins: A block of thin metal fins at the end of the heat pipes. Heat spreads into these fins so moving air can carry it away. This is where most dust ends up.
- Fan (blower): Most laptops use a small centrifugal blower. It pulls air in from the bottom or sides and pushes it through the fins and out the exhaust vent.
- Thermal paste: A thin layer of compound between each chip and the heat pipe. It fills microscopic gaps so heat transfers well. It dries out over several years.
- Intake and exhaust vents: The grilles on the bottom, sides, or back of the case. Blocking them with a blanket or your lap has the same effect as dust.
Here is the key point: the fan blades themselves are rarely the main problem. The real blockage is usually a mat of dust pressed against the heatsink fins on the inside of the exhaust vent. Blowing air into the intake grille often misses it entirely.
Warning Signs It Is Time to Clean Laptop Fans
You probably need to clean laptop fans if you notice any of these:
- The fan runs loudly even during light work like email or a single browser tab.
- The keyboard or bottom panel feels hot to the touch during normal use.
- Games, video calls, or exports slow down after a few minutes, a classic sign of thermal throttling.
- The laptop shuts down suddenly under load without a warning.
- A monitoring tool such as HWMonitor or the built-in Activity Monitor shows CPU temperatures above 90°C during routine tasks.
- You see grey fuzz when you shine a flashlight into the exhaust vent.
- The fan makes a grinding, clicking, or rattling sound. This can mean dust, but it can also mean a worn bearing that needs a replacement fan.
How Often Should You Clean Laptop Fans?
The right schedule depends on where you use the machine.

| Environment | Suggested cleaning interval |
|---|---|
| Clean office or home, no pets | Every 12 months |
| Home with pets or carpet | Every 6 months |
| Dusty, hot, or humid climate | Every 3 to 6 months |
| Gaming or heavy video editing | Every 6 months, with a vent check monthly |
If your laptop is more than two years old and has never been opened, assume it is overdue.
Tools and Safety Before You Clean Laptop Fans
You do not need a workshop. You need the right small tools and a few firm rules.
What You Need
- A precision screwdriver set (Phillips #00 and #0 cover most laptops; some need Torx T5)
- A can of compressed air or a small electric air duster
- A plastic spudger or guitar pick for prying clips
- A soft brush, such as a clean makeup brush or small paintbrush
- A toothpick or plastic tweezers for stubborn clumps
- A microfiber cloth and 90% or higher isopropyl alcohol
- A small tray or magnetic mat to keep screws in order
- Optional: fresh thermal paste and an anti-static wrist strap
Safety Rules That Prevent Damage
- Never let the fan spin freely under compressed air. A fan spun far past its normal speed acts like a generator and can push current back into the board. It can also wreck the bearing. Hold it still with a toothpick or spudger.
- Shut down fully. Sleep or hibernate is not enough. Unplug the charger.
- Disconnect the internal battery before touching anything on the board.
- Do not use a household vacuum inside the laptop. It can build static and can suck off tiny parts.
- Hold the air can upright. Tilting it sprays freezing liquid propellant.
- Work on a hard surface, not carpet, and touch a metal object first to discharge static.
How to Clean Laptop Fans in 7 Easy Steps
This method works for most Windows laptops and older MacBooks. Thin ultrabooks and recent MacBooks with glued parts can be harder, so read the model-specific guide first.
Step 1: Shut Down and Unplug Everything
Save your work, shut down from the operating system, and unplug the charger and any USB devices. Let the laptop cool for 15 minutes so you do not burn your fingers on the heat pipes.
Step 2: Check Your Warranty and Find a Repair Guide
Look up your model on the manufacturer’s support site or on iFixit’s free laptop repair guides. Many brands, including Dell and Lenovo, publish service manuals that show exactly which screws to remove. A guide prevents broken clips and saves time. We cover your warranty rights in detail in the next section.
Step 3: Remove the Bottom Panel
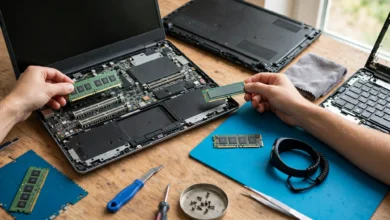
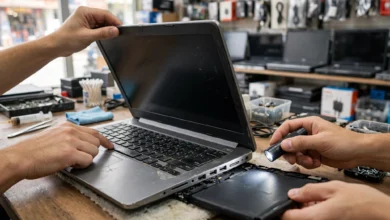
Flip the laptop onto a soft cloth. Remove every screw, and note that screws are sometimes different lengths. Some hide under rubber feet or stickers. Start prying at a corner near the hinge with a plastic tool, never a metal one, and work slowly around the edge.
Step 4: Disconnect the Battery
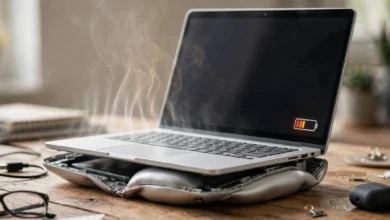
Find the battery connector and gently lift or slide it off the board. This one step protects the motherboard from short circuits while you work. If the battery looks swollen, stop and take it to a professional. A puffed lithium battery is a fire risk.
Step 5: Lock the Fan and Blow Out Dust
Press a toothpick against one fan blade so it cannot spin. Using short bursts of compressed air, blow from the fan outward toward the exhaust vent. Rotate the fan a few blades at a time and repeat. Use the soft brush to loosen dust stuck to the blades.
Step 6: Clean the Heatsink Fins and Vents
This step does most of the work. Look at the side of the heatsink fins that faces the fan. You will often find a grey felt mat of dust stuck to the fins. Lift it off with tweezers instead of blowing it deeper. Then blow air through the fins from the inside out. Wipe the intake grilles and the inside of the panel with a slightly damp microfiber cloth.
If your fan unscrews easily, removing it gives far better access. Disconnect its small power cable first, and do not bend the heat pipes.
Step 7: Reassemble and Test the Temperatures
Reconnect the battery, refit the panel, and replace every screw in its original spot. Power on and run a stress test or a demanding app for 10 minutes while watching temperatures. Compare them with your readings from before. Most people see a clear drop and a quieter fan.
Should You Replace the Thermal Paste?
If your laptop is older than three or four years and still runs hot after cleaning, the thermal paste may have dried out. Replacing it means removing the heat pipe assembly, wiping the old paste off with isopropyl alcohol, and applying a pea-sized amount of new paste. It is a bigger job. Some gaming laptops use liquid metal instead, which is conductive and should be left to a technician.
Can You Clean a Laptop Fan Without Opening It?
Yes, partly. With the laptop off, block the fan through the intake vent if you can see it, then blow short bursts of air into the exhaust vent and back out through the intake. This clears loose dust but rarely removes the mat on the heatsink. It is a good monthly habit, not a replacement for a full clean.
The Legal and Ethical Side of Laptop Repair: Lessons From Real Cases
Cleaning a fan is a small job, but it touches bigger issues: your right to repair, your privacy, and what happens to old parts. Each of the cases below involved conduct that regulators or courts treated as unlawful. They are worth knowing because they shape the choices you make before you open your laptop or hand it to someone else.
“Warranty Void If Removed” Stickers and the FTC
Many laptops carry a small sticker over a screw that says opening the case voids the warranty. In the United States, that claim is often not legal. The Magnuson-Moss Warranty Act generally bars companies from tying warranty coverage to using their own repair service or parts, unless they provide them free.
In April 2018, the Federal Trade Commission sent warning letters to six major companies that make cars, phones, and game consoles, saying their “void if removed” style warnings were likely illegal. In 2022, the FTC went further and brought cases against Harley-Davidson and Westinghouse generator maker MWE Investments for voiding warranties when customers used independent repair shops. Both companies agreed to change their practices.
The FTC’s guide to federal warranty law explains these rules in plain language. A few practical points:
- Opening your laptop to clean laptop fans does not automatically void a U.S. warranty. A company can still refuse to cover damage you actually caused, such as a cracked board.
- Warranty and consumer laws differ by country. Check your local rules before assuming you are covered.
- If your laptop is still under warranty and you are unsure, ask the manufacturer for a free cleaning or check their service manual. Some brands allow owner servicing in writing.
When Repair Technicians Snooped on Customer Data
The strongest argument for learning to do this yourself is privacy. In 2016, two technicians at a Pegatron repair facility working for Apple in California posted a customer’s private photos and a video to her Facebook account while repairing her iPhone. The case became public in 2021, when reports revealed Apple had paid the woman a multimillion-dollar settlement. The technicians were fired.
This was not a one-off. A 2022 study by researchers at the University of Guelph in Canada handed laptops to repair shops for a simple fix and logged what the technicians did. In several cases, staff browsed personal folders, and in a couple of cases they copied files to external drives. The researchers found that female customers’ devices were targeted more often.
What this means for you:
- If you can clean laptop fans yourself, your files never leave your hands.
- If you use a shop, back up your data and remove sensitive files first, or create a separate guest account with no access to your documents.
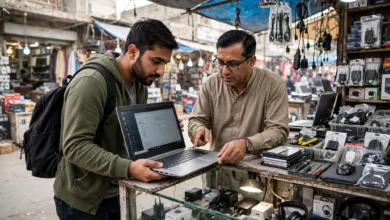
- Ask the shop how they handle customer data, and choose one that will work while you wait for a simple job like a fan clean.
Fake “Overheating” Warnings and Tech Support Scams
Scammers know that people worry about overheating and failing hardware. A common trick is a pop-up claiming your computer is damaged, infected, or about to overheat, with a phone number to call. The “technician” then takes remote control and charges hundreds of dollars for useless fixes. In 2017, the FTC and state partners announced Operation Tech Trap, a crackdown on tech support scams that had taken millions of dollars from consumers.
No legitimate company will contact you through a browser pop-up about your fan or temperatures. Real overheating shows up as noise, heat, and slowdowns, all of which you can check yourself with a free temperature monitor.
Illegal E-Waste Dumping and Safe Disposal
If your cleaning turns into a fan or battery replacement, the old parts have to go somewhere. Laptop batteries and boards contain materials that harm people and soil when burned or dumped. In 2012, Brandon Richter, the former CEO of Colorado company Executive Recycling, was convicted of fraud and illegal export after his firm told customers their electronics would be recycled safely in the U.S. while shipping them to developing countries instead. He was sentenced to prison time.
The lesson is simple: hand old parts to a certified e-waste recycler or a manufacturer take-back program. The EPA’s electronics donation and recycling page explains how to find one. Never throw a lithium battery in household trash, where it can start fires in garbage trucks.
A Quick Ethical Checklist
- Use genuine or well-reviewed replacement parts, and be honest when you sell a laptop you have opened.
- Respect other people’s data if you clean a friend’s or a client’s machine. Do not open their files.
- Do not resell a fan or battery you know is faulty.
- Recycle what you remove.
Common Mistakes When You Clean Laptop Fans
Most damage during a fan clean comes from rushing. Avoid these:
- Blowing dust deeper. Spraying air into the intake pushes the dust mat harder against the heatsink. Blow from the inside out, toward the exhaust.
- Letting the fan spin. Covered above, but it is the most common mistake and the most expensive one.
- Losing track of screws. A longer screw in the wrong hole can pierce the keyboard or a circuit trace.
- Pulling ribbon cables. Flip up the locking tab first. Never tug the cable itself.
- Using water or household cleaners. Use only high-percentage isopropyl alcohol on a cloth, and let it dry fully.
- Ignoring a bad bearing. If the fan still grinds after cleaning, replace it with the part number for your exact model.
Habits That Keep Your Laptop Cooling System Healthy
A clean fan stays clean longer with a few small habits:
- Use a hard surface. Beds, pillows, and blankets block intake vents and feed lint straight into the fan.
- Try a laptop cooling pad if you game or edit video. It adds airflow under the case and reduces load on the internal fan.
- Keep pets and food away from the keyboard and vents.
- Do a quick vent blow-out monthly with the laptop off, as described above.
- Check your power settings. A balanced power plan can cut heat during everyday tasks without a noticeable slowdown.
- Monitor temperatures every few weeks so you spot rising laptop overheating early.
Frequently Asked Questions
Is it safe to clean laptop fans yourself?
Yes, for most models, if you follow a guide for your exact laptop, disconnect the battery, and hold the fan still. If your laptop has glued panels or liquid metal, a professional is the safer choice.
Does compressed air damage a laptop fan?
Only if you let the fan overspin or tilt the can and spray liquid propellant. Short, upright bursts with the blade held in place are safe.
Will cleaning the fan make my laptop faster?
It often does. If your laptop was thermal throttling, a clean cooling system lets the processor hold its full speed for longer.
How much does a professional fan cleaning cost?
Prices vary by country and shop, but it is usually a modest fee compared with a new fan or board. Ask for a fixed quote, and use the privacy steps above before you hand it over.
Can a dirty fan permanently damage my laptop?
Over time, yes. Constant high heat wears out batteries faster, stresses solder joints, and shortens the life of the fan bearing itself.
Conclusion
When you clean laptop fans and the heatsink behind them, you remove the dust that causes heat, noise, and thermal throttling, and you can often get a sluggish machine back to full speed in about 30 minutes with a screwdriver, compressed air, and some patience; the method is simple (shut down, open the panel, disconnect the battery, hold the fan still, clear the heatsink fins, reassemble, and test), but the bigger picture matters too, because U.S. regulators have ruled against companies that used warranty threats to block owner repairs, repair technicians have been caught going through customers’ private files, scammers use fake overheating alerts to steal money, and illegal e-waste exporters have gone to prison, so doing the job yourself, backing up and protecting your data when you can’t, and recycling old parts responsibly will keep your laptop cooling system healthy while keeping you on the right side of both the law and good ethics.